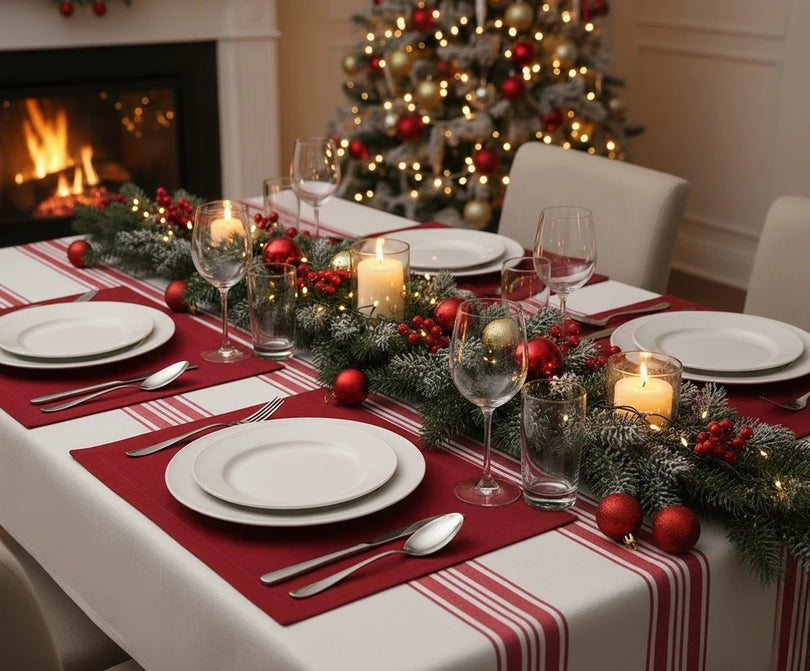
Begin with a simple cotton tablecloth and your favorite plates—layer in vintage cutlery and charming glasses to set the stage. Enhance the atmosphere with seasonal centerpieces or the beauty of fresh fall flowers. You can stop there or continue adding elements until your table is brimming with festive charm. Regardless of your approach, these creatively folded holiday napkins serve as the perfect starting point for your autumn entertaining endeavors.
Ghost Napkin Fold
Creating this charming ghost cloth napkin is a breeze! Begin by collecting the necessary items listed below.

Required Materials:
- White linen napkins - Ensure the dimensions are square, not rectangular.
- 3-inch foam ball or tissue crumpled into a ball
- Ribbon of your preference, 1-inch thick, and approximately 12 inches in length (we opted for a rustic burlap)
Placing the Foam Ball - Step One
Begin by laying your dinner napkin flat on a smooth surface.
Take your foam ball or crumpled tissue and position it at the center of the napkin. There is no need for precise measurements; feel free to eyeball the center point for a carefree touch.
Crafting the Head - Step Two
Proceed to form the ghost's head; a cloth napkin folds in half from top to bottom.
Preparing for the Ribbon - Step Three
Locate your ghost's inherent "neck" and grasp it securely as you smoothly thread the ribbon beneath the ghost's neck.
Securing the Bow - Step Four
Fashion a bow around the ghost's neck using the provided ribbon.
Secure the Ghostly Charm - Step Five
Tightly pull the ears of the bow to ensure the foam ball remains securely in place. Trim the ends of the ribbon to your preferred length.
Table Setting Complete!
And there you have it! A ghostly dinner companion is now ready to add a touch of whimsy to every autumn table. These decorative napkins create an irresistibly cute tableau, particularly when paired with our graveyard brownies.
Bat Banter Napkin Fold
Add a whimsical spookiness to your Halloween dinner party with this adorable bat napkin! All you require for this fold is a black napkin (ensure the dimensions are square, not rectangular).

Creating a Triangle Fold - Step One
Initiate the folding process by forming a triangle.
Repeat the Corner Fold - Step Two
Fold the napkin once more, this time into a smaller triangle. Rotate it so that the point is facing you. Ensure a neat finish by smoothing down the edges.
Shaping the Point - Step Three
- Fold the point upward, aligning it with the straight edge. Ensure the end extends 2 inches beyond the top.
- Tuck the small tip underneath the linen napkin, resulting in a distinctive trapezoid shape.
Refine Your Finish - Step Four
Gently smooth down the edges for a polished finish.
Crafting the Wings - Step Five
Locate the midpoint of the wedding napkin and secure the bottom with your left hand. Using your right hand, fold the bottom corner of the right side upwards to form one wing. Repeat this action on the left side.
Tip: Ensure a smooth presentation by ironing over the edges of the final folds before placing the napkin on the plate!
Table Arrangement Unveiled!
Voila! Presenting your batty-tastic napkin creation. This aesthetic perfectly complements a platter of delectable spiced chocolate bat cookies.
Witch Hat Napkin
Ideal for your upcoming coven gathering, this whimsical witch's hat folding is entertaining and a breeze to create! (Pssst... if you've ever tried your hand at folding an elf hat, you'll find this delightfully similar!)

Supplies for Enchanting Witch Hat Fold
Gather the following essential items to bring the whimsical witch hat fold to life.
Required Materials:
- Set of black cloth napkins(we opted for linen). Ensure the dimensions are square, not rectangular.
- Hot glue gun (ours is cordless) and glue sticks.
- A one-inch wide green ribbon. Cut a nine-inch length from the spool and trim as needed once the hat's diameter is determined.
Locate the Center - Step One
Begin by folding dinner napkins into a rectangular shape. Position your right pointer finger on the top center point of the napkin. Simultaneously, use your left hand to grasp the left top corner of the napkin.
Commence Folding - Step Two
Initiate the folding process by rolling up the napkin. Maintain your pointer finger at the top center as you proceed.
Move the Napkin - Step Three
- Once folded (or rolled), your napkin should have a sharp point at the top and two tails (like a W) at the bottom. If you don't have two distinct tails, return to step two and refold. Your folding napkins were likely either too big or too small. Readjust the width of your folds and try again.
- Position the napkin so the seam is facing up.
Crafting the Hat Brim - Step Four
Take hold of the lower folds of the napkin and fold them outward. Continue until you've successfully fashioned the hat brim, providing a smooth surface for the hat to rest upon.
Crafting the Hat Cone - Step Five
Having folded the ends upward, your hat should now boast a defined and uniform bottom edge. Give the cone a playful fluff with your hand, transforming it from a flat surface (for a perkier cone, consider adding a small amount of polyfill).
Stand your table napkin upright. It should maintain its newfound shape with ease.
Crafting the Hat Band - Step Six
- Verify the length of your ribbon by encircling it around the hat, just above the brim. Trim any surplus length.
- Apply a small amount of hot glue to one end of the ribbon, securing it to the other end to form a cohesive band. Take care not to allow any hot glue to contact the napkin.
- Allow the glue to cool thoroughly before proceeding.
Positioning the Hat Band - Step Seven
Gently slide the band over the pointed tip until it snugly sits on the brim.
Make any necessary adjustments and fluff as required. Allow it to cool.
Table Setting Time!
Well done! You've crafted a witch hat! Place it gracefully on a flat plate to ensure it stands tall as you await your guests' arrival. Pair it with an adorable black cat cake for the perfect witchy gathering. Let the magical festivities begin!
Pumpkin Napkin Fold
Looking to infuse your table with the essence of the fall harvest? Give this uncomplicated pumpkin fold a try! Begin by collecting the necessary supplies…

Pumpkin Napkin Materials
To achieve the pumpkin fold, gather the following essential materials.
- Orange linen napkins: Ensure the dimensions are square, not rectangular.
- Wooden skewer: Minimum length of 12 inches.
- Mini Bundt pan: Approximately 3 or 4 inches in diameter.
- Preserved pumpkin stem (faux options are acceptable).
Set the stage for our pumpkin creation - Step One
Spread the orange napkins on a level surface and position the Mini Bundt pan towards the center (aim for the middle, but it's okay if it's not perfect).
Tilt the Bundt pan sideways, securing it with one hand.
In your other hand, take hold of the wooden skewer.
Craft the Shape - Step Two
Gently thread the napkin through the center of the Bundt pan using the rounded end of the skewer, forming a petite tail. Aim for about an inch or two of napkin to secure it in place. The required effort may vary based on the pan's opening size.
After creating the tail, place the Bundt pan and napkin back onto the flat surface.
Craft the Pumpkin Shape - Step Three
Using linen napkin folds, inwardly shape the pumpkin. A helpful tip is to gently twirl the edges of the napkin and proceed to wrap them around the central column of the pan. Continue this process until the entire napkin is elegantly bundled within the pan. Continue the folding process by tucking the napkin further into the pan, using a bit of firmness if needed to ensure a snug fit.
Review Your Folds - Step Four
Before flipping the napkin over, ensure all your folds align with the wrapping method outlined in step three. The folds should mirror the image on the left.
Turn your pumpkin upright, positioning the hole formed by the dowel rod facing upward while the tail points downward.
Add Your Stem - Step Five
Place your chosen stem onto the pumpkin. We opted for a natural stem and discovered that inserting it into the hole was effective. If stability is a concern, a touch of tape can be used to secure it, but avoid using hot glue or other adhesive substances to prevent damage to the napkin.
Set the Table!
With the stem in place, your table is all set! This charming pumpkin fold adds elegance to your Halloween or Thanksgiving dinner. And why not top off the meal with a delightful pumpkin patch cake for dessert?


